COLORED PENCIL
"SWEET" PHOTO-REALISM


^ student examples ^
Click this link for searching/saving/printing directions:
http://rocheart.weebly.com/uploads/3/2/1/2/32129237/directions_for_photo_2023.pdf
http://rocheart.weebly.com/uploads/3/2/1/2/32129237/directions_for_photo_2023.pdf
Choose your own photo or pick one below...


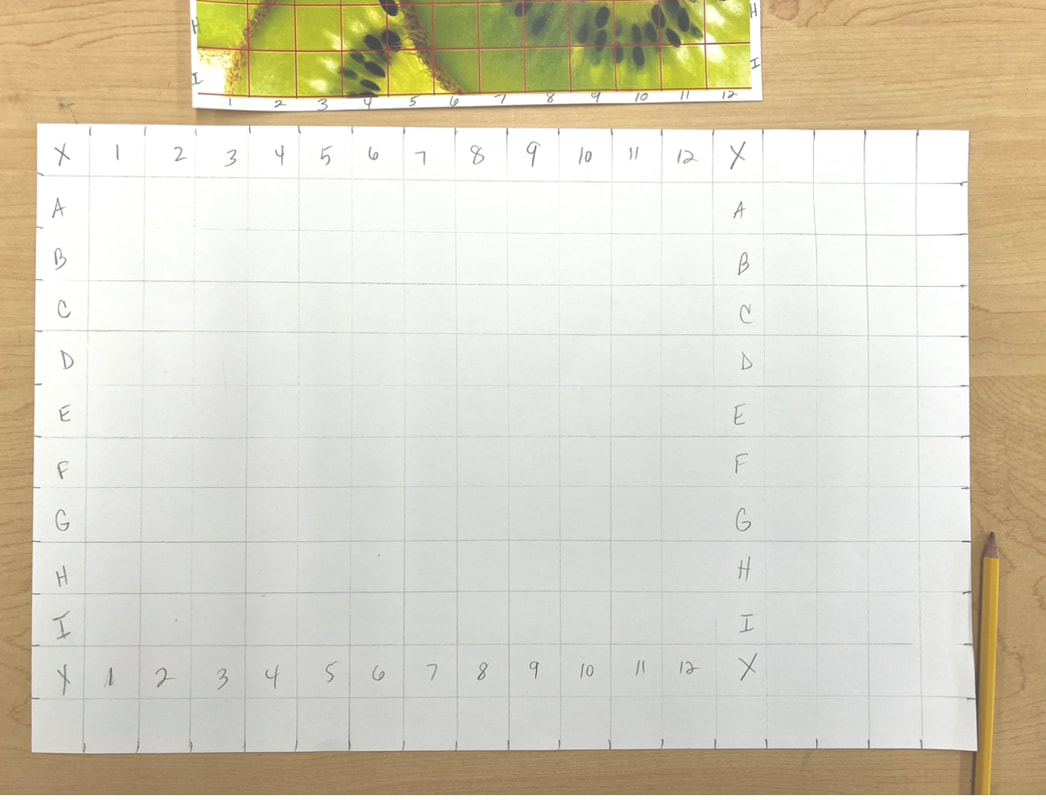
Setting Up Your Paper & Grid
|
Step 1: Make a mark every 1" on all 4 sides of your paper Step 2: Use an 18" ruler to connect all the lines, forming a grid. ***DRAW THE GRID LINES AS LIGHTLY AS POSSIBLE!*** (You can erase a part of the line after you draw it to see if its light enough - if you can still see it after you erase it, then its too dark) Step 3: Now set up the reference photo. Write letters and numbers all around the boxes of your reference photo. Step 4: Lastly, set up your drawing paper. Start by putting an "X" in the top-left corner box of the drawing paper. Then add your letters and numbers according to the amounts on your reference photo as shown here ---> |


|
